Can Am X3 ZRP Alternator Kit V2 Drive
Follow #9 and on for bearing pack rebuild/replacement kit
Note: You will need to purchase a service manual from Can Am to complete this install or you will need to take it to a certified dealership. Removing and reinstalling the engine cover and sensors is fairly precise and should not be attempted without the service manual, proper tools, and adequate mechanical know-how.
-
This kit was designed and intended for racing purposes and thus carries no warranty. (Except for the alternator itself which has a 1-year warranty from Race Proven) Slight modification to these instructions maybe needed for each specific application.
-
Can Am Chassis vary wildly. We’ve seen up to 1” variations from one chassis to another. Because of this some custom fabrication may be required to fit this Alternator Kit to your specific car.
-
The battery that the alternator is connected to must be charged to at least 12.6 V before the alternator is connected. If the battery is below 12.6 V the alternator will not power up.
-
Green wire goes to a 12v ignition lit wire (non-constant voltage. e.g. not to the battery). Yellow wire is for an alternator failure light. Which is not included and not required for use. Clip and cap this wire if not in use.
-
Power wire is not included. 4G wire is recommended to run from the alternator to the battery.
-
All bolts on the cover come loose from ZRP and need to be torqued except for the two nuts holding on the two pullies which have been torqued from the factory.
-
Consult the service manual to remove and install the stock engine mag cover
-
Once the stock cover is removed, transfer the stator and all sensors and plugs from the stock cover to the ZRP billet engine mag cover.
- Be gentle with the cover and water pump assembly as it is fragile.
-
Install oil filter and cap on to ZRP engine mag cover.
-
Remove stock crank/flywheel bolt and washer. Install new ZRP Crank bolt with the black coupler installed before torqueing (do not reuse washer). It is a 30MM socket, a 1 3/16” can be used if necessary. Use blue Loctite and torque to 111ft-lbs.
-
Remove pulley, bearing pack and alternator mounting arms from mag cover before installing.
-
Install the Mag cover referencing Can-Am service manual for mag cover install procedure including torque specs and sensor tolerances.
-
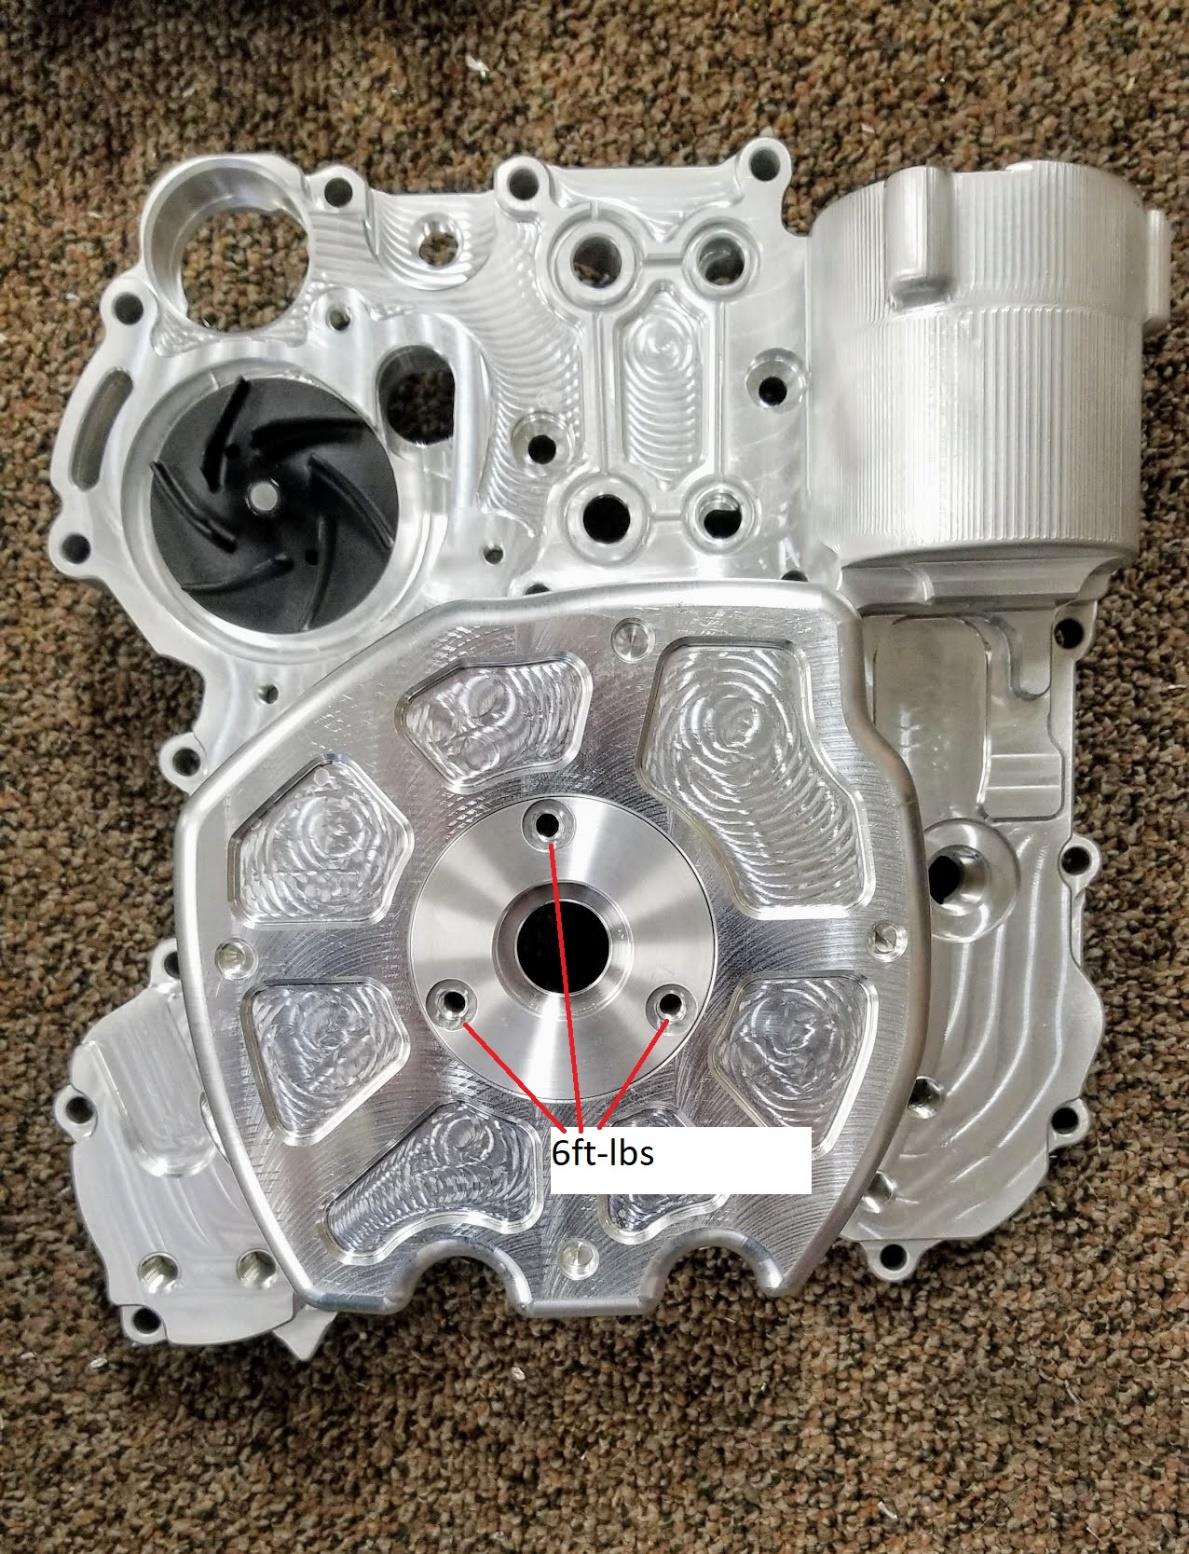
**Insert bearing pack with coupler and align with the black coupling center, alight bolt pattern. Tighten down bearing pack bolts to mag cover then install the pulley with the larger flange going into the seal.
-
Loosely place belt on both drive pulley & alternator pulley
- Loosely mount the belt cover bolts.
-
Tighten the LH nut on the coupler shaft to 45 ft-lbs and use blue Loctite. You will need to hold to primary to properly torque this bolt
-
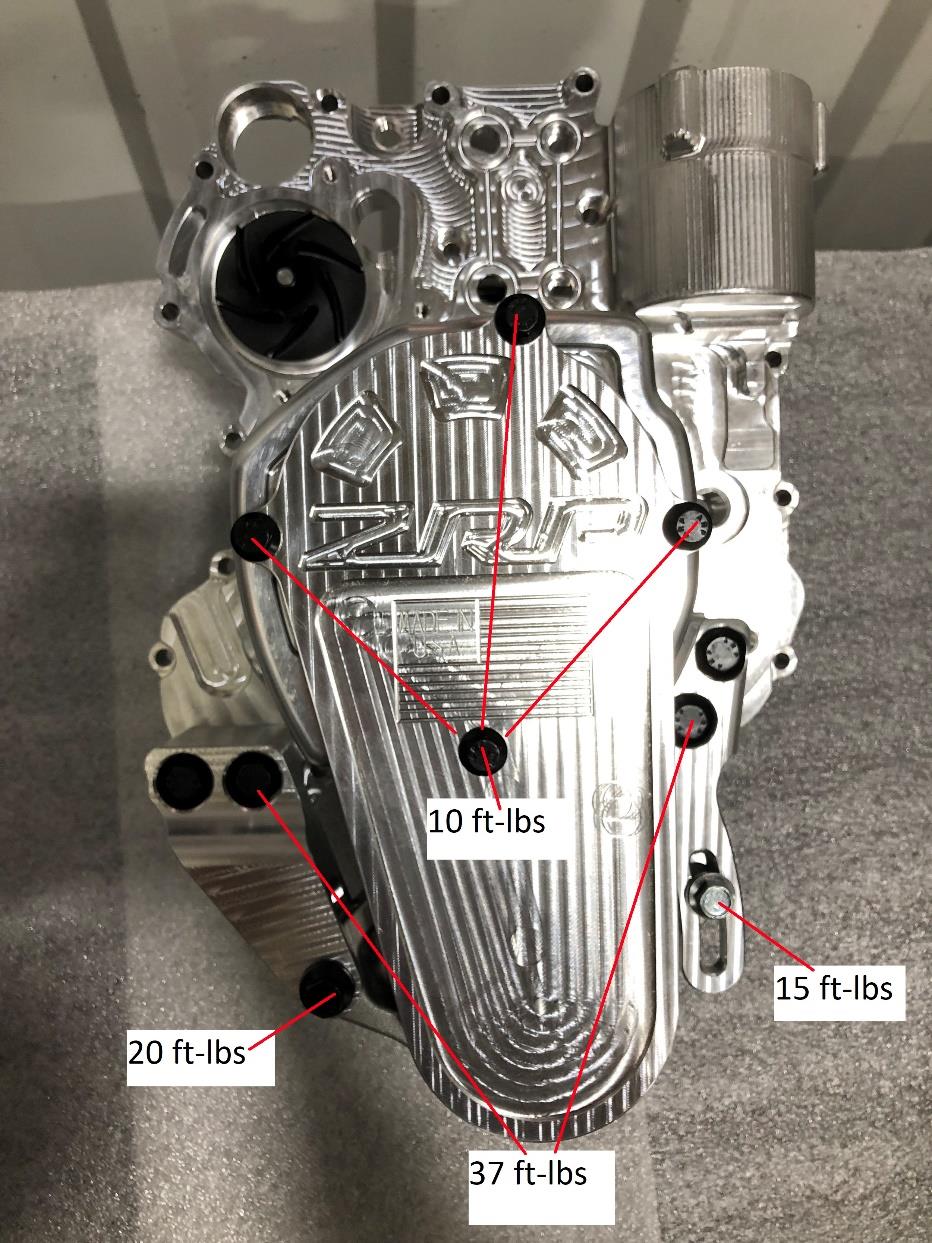
Torque the belt cover bolts as shown below
-
Tighten the Belt.
-
The Stock black hose holder/engine cover can be reused with the included spacer and bolt. The new spacer goes behind the cover at the bottom mounting hole. This cover does not need to be reused. Make sure all hoses are secure and away from sharp edges.
-
Check alternator belt tension after the first hour of use.
-
Use blue Loctite on all bolted joints associated with the alternator. Torque with an appropriately sized and high-quality torque wrench. (See below.)
ZRP Crank Bolt with Coupler installed ZRP Bearing Pack with Pulley


